Hello and happy Saturday!!
Today I'm sharing a card that in my opinion, screams Valentine's Day!
I've used STAINED GLASS POPPIES from I Brake for Stamps.
There are several stamps in the stained glass series. You can see them all here.
I also used HUGS...KISSES... verse.
Don't forget to use my coupon code. You can SAVE 10% each and every time you shop. It never expires and can used over and over again!
I've created a little tutorial to show you how I put the shaker window together.
The first thing I did was to stamp the image twice because you need the bottom full image and then you need the frame on top to hold the acetate on.
I didn't color the full frame on the part that would be on the bottom because it isn't going to show. I did want to see if I liked the purple color with the colors I used on the image though so I colored a little of it. Once I saw that I liked the color combo I colored the frame for the top.
Next I cut out the inside of the frame with a penblade knife. I used a metal ruler to make sure my line stayed straight. I used metal because I tried a plastic ruler once and found that the blade was so sharp it sliced thin pieces off the ruler as well as cutting the paper. Lesson learned.
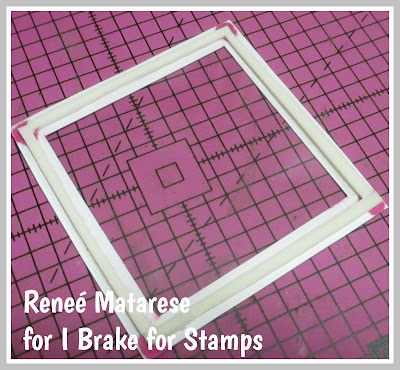
Next, cut out the outside with scissors and measure and cut a piece of acetate to the same size as the frame. It's there...it's just so clear you can't see it...lol.
I used Scor-Tape to adhere the acetate to the frame.
Once the acetate is in place I added my dimensional foam tape.
Fill the shaker window, peel the backing off the foam and adhere the colored and stamped image to it. Flip it over and viola! Your shaker is made. It's really pretty simple. I purposely made sure there was a glare on this photo so you could see the acetate that holds your beads in.
I wanted to emboss my paper with some hearts and to make sure enough of them showed I laid the shaker box down and measured how wide and tall I wanted my front panel to be. It also needed to be wide enough to fit the sweet verse on it.
I embossed my paper and added a little extra pop of color with some designer paper.
Here it is without the glare. You can see the colors of the image and beads better in this photo.
On the inside I used BE MY VALENTINE from VALENTINE SHEET -DESIGNS.
I hope you enjoyed this tutorial and are inspired to try this if you never have.


No comments:
Post a Comment