Showing posts with label Castle Cubbies. Show all posts

Sunday, August 27, 2023

Flying Fairy from Art Impressions


Flying fairies for Clara Dawn!

Hello everyone and Happy Sunday!

My friend's granddaughter is turning four in September and guess what she likes?  Pink, gems, unicorns and fairies.  Shocking!  lol!


Check out how the fairy really flies!


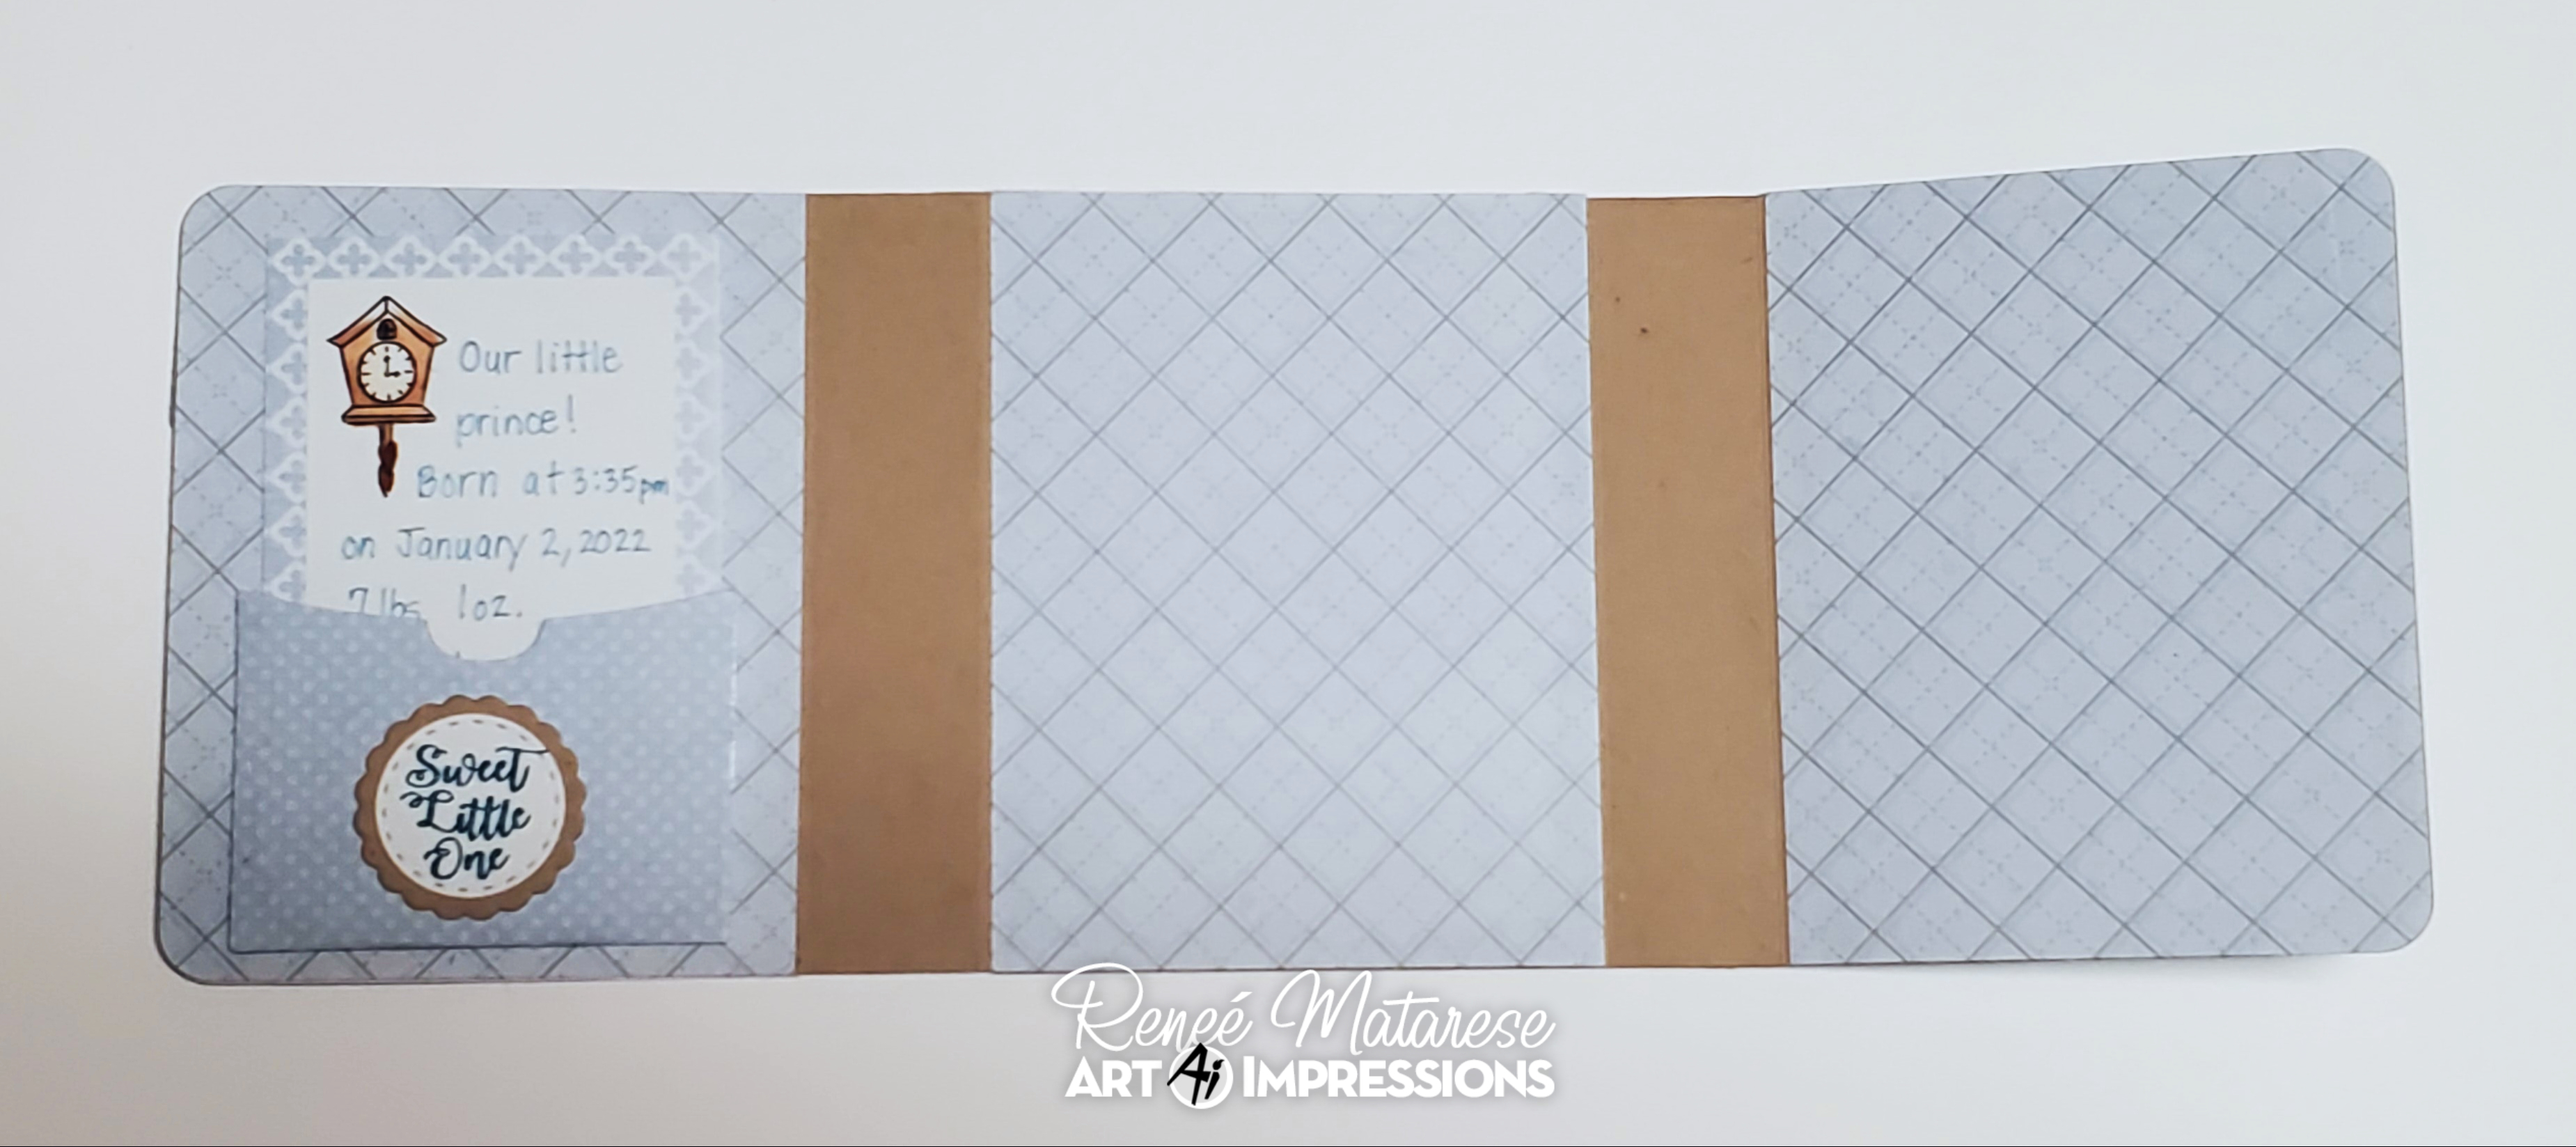
Here's the left side of the inside.


The right side of the inside.


I filled a little bag full of gems for my friend to give her with the card.


I put a little heart, star and butterfly inside the doors and windows that open up.


I made a second card to send to Ai which was created with the current All Wrapped Up challenge in mind.  Use either real or stamped ribbon or bows.


The right side of this one was done using all Ai stamps and dies.


Now I have two mini picture tutorials for you.

I've had a few people talk about not getting a stamp and die to line up.  (I'm not just talking about Annie, who has replacement dies coming)  Here's a quick little tutorial on how to get perfect stamp and die alignment.

BEFORE stamping, cut out the die cut.
Place the negative space in your stamping platform.


Place the stamp in the cut out space.


Close your platform cover to stick the stamp to it and then open it back up.


Place the die cut back into the cut out space.


Ink up the stamp, close the cover and stamp your image onto the die cut.
Viola!  You have a perfectly stamped and die cut image.


My next tutorial is on how to create the little flying fairy.  Last fall I made two cards with flying images.  One was a Halloween card with flying bats and one was a spring card with a bird and bee.  You can click on each photo to be taken to the original posts.


To make these little cuties fly is really pretty simple.  I cut a hole with a hole punch into my cardstock and into a little piece of acetate.  (I save all my packaging from everything to cut up to make clear cards, shakers and things like this) 


I use a brad to attach the acetate to the cardstock.  Make SURE that you don't close it tightly or your acetate won't swing.  Test it before adhering anything to the card base.  I prefer not to see the brad so I always create something to go over it.  Make sure not to use your foam tape in any area that will stop the little "pendulum" from swinging.


I've used a cloud and only put the tape at the top.


You'll need to pop up the back as well so that the brad can maneuver around.
More foam tape makes that happen.  That's it!  Just a hole punch, a brad and some foam tape.
Wouldn't this be super cute with an angel on a Christmas card?!


Enjoy the rest of your weekend and be sure to share if you decide to make something FLY!!!


5463 – Slimline Dies Set for left hand border on side of card and for inside of Madelyn's card for the sentiments.
5721 – Nested Heart Dies
5562 – Journal Letter Die Set for Clara and Madelyn's names.

Copics used:
G03, G14, Y02, RV02, RV06, N0, N2, N4, E00, E33, E1, E95

Twin Tones:
Lime Green, Yellow, Gray, Sky Blue, Turquoise Blue,
Coral Pink, Princess Pink and Pale Rose


Sunday, April 9, 2023

Happy 3rd Birthday!

 Hello Ai fans!

Little girls (and big girls)
just love their fairy tales!

I had a request for a pink card using either something girly or unicorn themed.

I sent her photos of the retired 5752 Floral Carousel Set and the 5225 – Castle Cubbies.

She thought her soon to be 3 year old niece would love the castle.


I used a piece of acetate to make one of the unicorns "fly."  I know that aren't known for flying but they're magical so I feel like if they really put their mind to it...lol!


The front is a shadowbox and I cut the opening and made the sparkly pink frame using 
5063 – Rectangle A2 Double Stitched Dies

Both castles were coated in a layer of WOSC Wink of Stella Glitter Clear Brush Pen – Clear and are so glittery though it's tough to see in the photos.


I decided to make a second version in blue.
This time I added dragons and made one of them fly.


The dragon wings were also done with Wink of Stella and the unicorns and torch flames have some Stickles for added sparkle.


Dawn Kuklewicz sent me some adorable little gems for my birthday so I added several of them for some extra bling.


The Critter Cubbies are possibly my favorite interactive series of all time with the Sub CubbieMushroom Cubbie and this Castle Cubbie being my favorites but PLEASE!  Don't make me choose!
Because then...the hen house,  the barn, the owls...I LOVE them ALL!


Twin Tone Markers:
Yellow
Sky Blue
Chocolate
Candy Pink
Raspberry

Copics used:
R32, R81
Y15
B41
G20, G43
N1, W5
E31, E42, E43, E51, E81

Thursday, August 18, 2022

Hello Baby Boy Journal from Art Impressions

Hello Ai fans!

There's a new challenge on the Art Impressions blog called Dynamic Duo.
They want to see at least 2 stamp or die sets on your creation.

I used 9!  WHAT??  Yes,  9 different sets plus the new Bleed Proof White paint which is incredible!!
You don't need to be a watercolor artist to love that stuff!

I've been working on a baby journal.

Today I'll share my cover and the first two pages.

All products will be linked at the bottom of my post.


The little sheep is popped up on foam dots so the the clasp will close underneath him.


The decorative clasp dies are so pretty!  They're so ornate and just perfect for whatever journal you decide to make.


The back of my journal is the only page that I won't be "decorating" but with the back of the clasp it still looks pretty.


My first page has a pocket for a stat sheet about the birth of this baby boy.
I used a stencil to draw lines for my handwritten text which I erased afterwards.


Here's the insert out of it's pocket after I erased the lines.


This is the entire journal from the outside.


Here it is opened on the inside without any pages added yet.


This is my first added page so with the page on the inside of the front cover,  this is technically page 2.


I used the Bleed Proof White paint to add little dots on the fabric.


I haven't glued my page in yet because I need to decorate the back before I do that.
Stay tuned this Sunday to see the next two pages.


Copics used:

Inside cover-Page 1:
C2, N4, E00, E23, E30, D34, E37, Tombow 526

Page 2:
R83, Y23, B1, B93, E00, E23, E37

Sunday, April 19, 2020

Thank you Castle Cubbies card

Hello Ai fans!

This is the second 5225 – Castle Cubbies card that I've shared in the last few days.  I changed this one up a little bit.  My other one was a birthday card and this one is a thank you card for a little girl who gave me a birthday gift the last day before we were quarantined.


This set is from the Critter Cubbies interactive line at Art Impressions.
I made the rainbow with the Spellbinder Grand Circle die set.


All of the little doors and windows can be opened and you can "hide" people, animals or props behind them.  The windows on my card that are yellow are also cut out so you can have more things peeking out if you want.  I chose to put yellow paper behind them this time.


Copics used:
G03, YG23, B06, B66, BV11, BV17, BV20
E00, E29, E34, E93, E99, N0, W6, Y38, YR04, RV02, RV06