Hello Ai fans!
It's my turn to share a new release with you! Art Impressions has the most beautiful water color images around and this sweet new set is no exception!
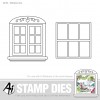
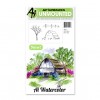
This pretty new set is called WOODEN GATE (sku#4762)
You can find all the wonderful MINI WATER COLOR sets
HERE.
I'm still a little afraid of water coloring but after making this card I gained a lot of confidence. Trust me...If I can do it, you can do it! There are so many different mediums that you can water color with, There are the little water color cakes, paints, distress inks, pencils, markers, etc. I chose to use pencils and
Marvy Markers. You treat the pencils like you would any colored pencil for the most part. Just color in the areas (lightly) that you want to color. Then go over them with a water pen.
Here, if you look carefully you can see I shaded in the thin part on the inside of the arch.
Next, I used my water pen to pull a little bit of color from it and add shading to the gate.
Next, I penciled in a little blue, colored the brackets and added some grass.
Now it's time to add some real color! I used my Marvy markers to color directly onto the stamp.
Then, just like with the pencils I used my water pen to blur them a bit and give them the water color effect I was looking for.
I mounted my door on a display easel made with the Ai Easel Die.
I have to apologize...I used a fence and gate which I've now just realized have been discontinued. I did find an alternate you could get instead if this is a look you like. Take a peek at
WC EZ Project A (Sku#4271).
I mounted my card on the Square Easel Die (Sku#4699)
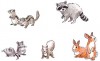
My foliage came from a variety of sets...
I added some highlights to the flowers and rabbits with a white gel pen.
I think the gel pen makes the fur look pretty real on their bellies.
Marvy colors used: No. 43 Brilliant Yellow, 45 Sepia, 88 Terra Cotta, 15 Olive Green, 20 Magenta, 28 English Red
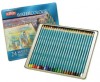
Water Color Pencils:
Staedtler 38, 556
Derwent: 6 Deep Cadmium, 18 Rose Pink, 34 Sky Blue, 36 Indigo, 38 King Fisher Blue, 40 Turquoise Green, 58 Raw Sienna, 66 Chocolate, 68 Blue Gray